Stack環境のHaskell用SublimeText3セッティング(ArchLinux)

Stack(Haskell)開発環境設定については「StackでHaskell開発環境を整える(ArchLinux)」で書いた。また、SublimeText3の基本的な設定については「ArchLinuxでSublimeText3を快適に使う(共通セッティング編)」で書いた。
今回はStack環境のHaskellをSublimeText3で扱えるようにセッティングする。
目次
SublimeText3のプラグイン
stack-ide-sublime
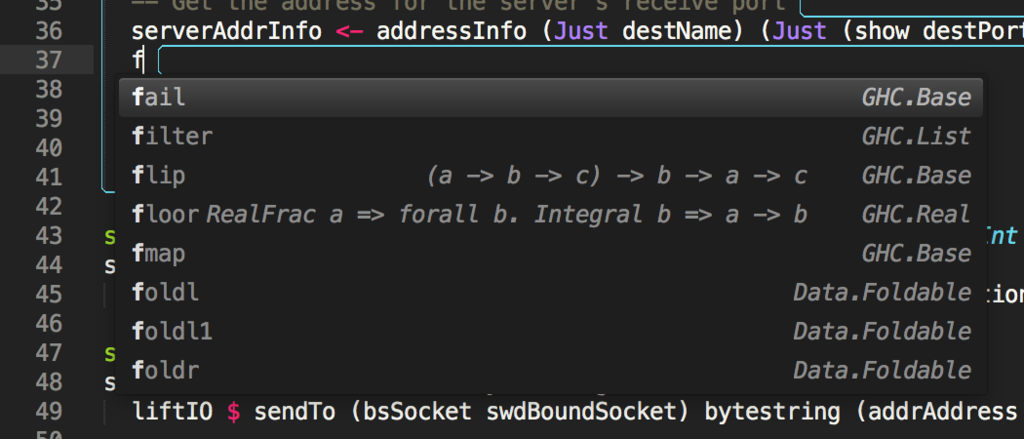
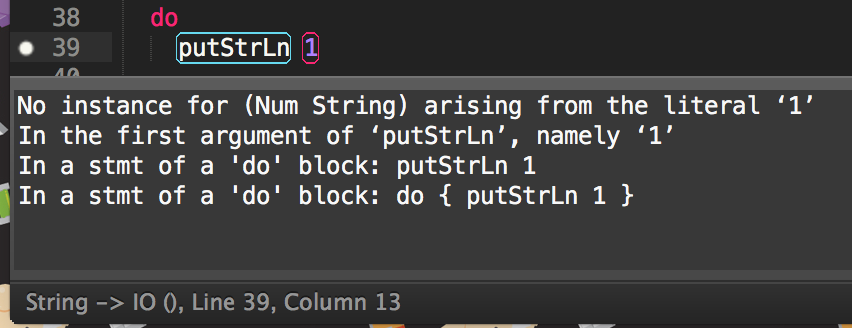
「stack-ide-sublime」はemacs用に作られた「stack-ide」を介してSublimeTextでもstack環境のHaskellを編集し易くするプラグイン。
スクリーンショットを転載しておく。


stack-ide-sublimeの導入手順
$ cd ~/<Stackでプロジェクトを生成するディレクトリ>
$ git clone https://github.com/commercialhaskell/stack-ide.git
$ cd stack-ide
$ git submodule update --init --recursive
$ stack build --copy-bins
# ArchLinuxの場合のPackagesディレクトリ
$ cd ~/.config/sublime-text-3/Packages
$ git clone https://github.com/lukexi/stack-ide-sublime.git SublimeStackIDE
- SublimeText3を起動「Preferences」→「Package Settings」→「SublimeStackIDE」→「Settings User」を開き下記コードを入力保存
{
  // List of directories to add to the default system path when running 'stack'.
   "add_to_PATH": ["/home/<user name>/.local/bin"]

  // Controls the messages sent to the console.
  // Possible values: "none", "error", "warning", "normal", "debug".
  ,"verbosity": "debug"

  // If "show_popup" is true, a popup will appear right below selection
  // to show the type in addition to the text shown in the status bar
  ,"show_popup": false

  // if show_popup is true, clicking on types displayed in the popup panel will
  // open a web-browser at specified hoogle_url with the right type query.
  // if you set this to your own hoogle webserver setup for your project,
  // you'll be able to see the documentation for your own type
  // example: "hoogle_url": "https://www.google.fr/search?q=what+is+haskell+"
  ,"hoogle_url": "http://www.stackage.org/lts/hoogle?q="
}
SublimeREPL(Haskell)
「SublimeREPL」は既にこちらの記事でインストール済み。
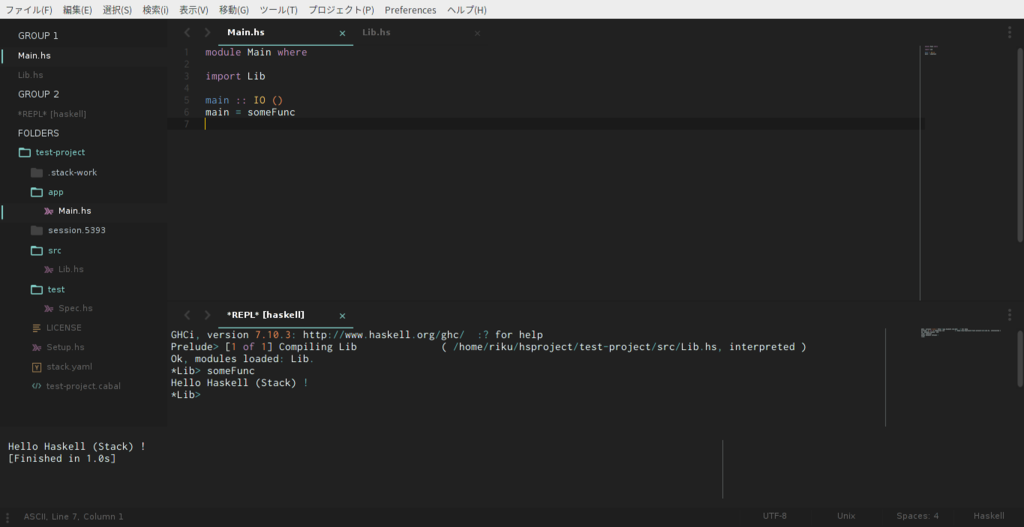
SublimeREPLのHaskellを選択するとghciがSublimeTextの中に立ち上がる。
手順は、「Ctrl + Shift + P」→replhと入力し「SublimeREPL: Haskell」を選択すればよい。
FluentREPL
「FluentREPL」はSublimeREPLと連携し、コード編集後に保存すると自動でSublimeREPLのghciでロードしてくれるプラグイン。loadコマンドを省略できるので制作した関数などのテストが捗る。
インストール手順はこちらを確認。
SublimeText3のビルドシステム
SublimeText3のデフォルトで入っているHaskell build SystemはStackコマンドが書かれていないので、build SystemをStackコマンドで書き換える事となる。
ビルドシステムの設定
ビルドシステムの設定は以下手順。
~/.config/sublime-text-3/Packagesディレクトリ内にMyBuildSystemディレクトリを作成作成した
MyBuildSystemディレクトリ内にstack.sublime-buildファイルを新規作成し下記コードを入力保存
{
    "working_dir": "${project_path:${folder}}",
    "shell_cmd": "stack build",
    "file_regex": "^(..[^:]*):([0-9]+):?([0-9]+)?:? (.*)$",
    "selector": "source.haskell",

    "variants":
    [
        {
            "name": "exec",
            "working_dir": "${project_path:${folder}}",
            "shell_cmd": "stack exec test-project-exe"
        }
    ]
}
少し解説。
"working_dir": "${project_path:${folder}}"は「stack build」コマンドや「stack exec ・・・」コマンドを実行する場合に各プロジェクトディレクトリ直下で実行しないといけないので必ず指定する必要あり。
"shell_cmd": "stack exec test-project-exe"のtest-project-exeの部分はプロジェクトを切り替えたら手動で変更する。(プロジェクト名だけ切り出す手段が見当たらないOrz)
ビルドシステムの使い方
ビルド(stack build)は「Ctrl + Shift + B」→「stack」を選択で実行
実行ファイルの実行(stack exec)は「Ctrl + Shift + B」→「stack - exec」を選択で実行
編集後記

他にも「SublimeHaskell」プラグインを利用するものもある。様々な変更時の対応は「stack-ide-sublime(というよりstack-ide)」がかなり早い気がするのだが、「SublimeHaskell」は元々「Haskell Platform」に対応していて、最近「Stack」にも対応したという事でStackだけではないという優位性がある。
迷うが...好きな方を使えばよいw